The Low Down on Vinyl
Vinyl can be one of the most minimal, practical, and sometimes most visually appealing signage options, but with variation in custom designs or conditions, it is not always as cut and dry as more conventional options. Today, we are going to go more in-depth on vinyl as a signage option, how it works, what conditions are ideal for its use, and discuss the installation process.
Find Acrylic Signs with Vinyl here!
What is Vinyl?
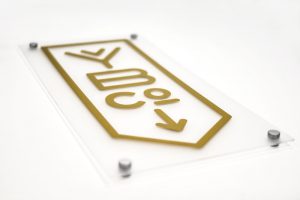
First things first, what is vinyl? For signage purposes, vinyl is a material that can be printed and/or cut to a design and paired with adhesive. This gives us various options for it. We can use vinyl to add on to more traditional signage (like this Clear Acrylic Sign above) or we can solely use the vinyl with adhesive and apply it on a number of surfaces. Common surfaces are glass or walls, but more alternative surfaces can be used as well (below).
Find Etched, White, or Frosted Vinyl Decals and Logos here!
Find Custom Vinyl Wall Wraps here!
Find Custom Vinyl Wraps here!
Conditions for Vinyl Installation
For best results and an easier installation process, it is important to have ideal conditions, including weather, surface types, and paint. Weather is the most temperamental factor to consider when installing vinyl. It should always be over 50 degrees F, but we would even suggest at least 65. Low humidity is also important in addition to as little wind as possible. For surfaces, the smoother it is the better. If a wall or surface is more textured, it will be more difficult for the vinyl to adhere to, and more difficult to install. Given this nature, it is important to clean your surface before applying vinyl. Paint is also important to consider for the sake of the adhesive. Standard paint will work best, gloss/enamel being particularly effective, while low VOC and stain protective paints should be avoided. For more textured surfaces, like brick, we offer different qualities and types of vinyl that will influence the adhesion, durability, etc.
Find Custom Vinyl Wall Wraps here!
Installation Process
Vinyl installation is a simple concept, but the process can be more complex for the sake of perfection. The vinyl starts between two sheets of paper, the first being transfer paper, which the vinyl stays attached to when the other sheet, the wax backing paper, is removed. The vinyl on the transfer paper is applied to the surface slowly to avoid bubbles or wrinkles, and the transfer paper is removed after the vinyl is thoroughly pressed to the surface. There are more detailed steps to the procedure than that, but that is the essential process. Vinyl can be applied independently, but our installation crew can help out locally, which is especially beneficial for more large-scale installations. We charge $75 per hour per person for installation. Install time is dependent on the scale and location, so that varies depending on the order. Extra install charges may apply for travel time, special lifts needed, or post-heating. To contrast vinyl removal, if needed, essentially consists of peeling the vinyl from the surface, and this will usually require a blade or X-Acto knife. We offer vinyl removal as well, for the same rate as installation.
Finally, pricing on vinyl is a very conditional matter, and because of the custom nature of the process, it often varies depending on the order. The scale, type, and installation of the vinyl can influence the price. However, if ordering vinyl, you are able to select different materials of different qualities that will affect the overall price. For any vinyl project, we offer free quotes, which you can access through our website/email. Hopefully, this has been an informative resource on your vinyl options, the installation process, and vinyl in general. Thank you for reading!
Written by: Jack Machacek
Contact: jackm@officesigncompany.com
www.officesigncompany.com


